CSS Syntax
CSS consists of rulesets that define how HTML elements should be styled. A ruleset consists of a selector and one or more property-value pairs.
Example:
selector {
    property: value;
    property: value;
    /* more properties... */
}
Explanation
- The selector defines which elements are styled
- The property defines what is being styled
- The value defines how it looks
In this example, the selector identifies the HTML element(s) to which the styles should be applied. The property defines the specific aspect of the element's appearance, and the value specifies the desired value for that property.
Selectors
To apply styles to HTML elements, you can use different types of selectors. Let's explore a few common selector types:
Tag (Type) Selector
A tag selector selects elements based on their HTML tag name.
Example:
p {
   color: blue;
}
In this example, the p selector selects all <p> elements and sets their text color to blue.
Class Selector
A class selector selects elements based on the presence of a specific class attribute value
Example:
.my-class {
   font-weight: bold;
}
In this example, the .my-class selector selects all elements with the class="my-class" attribute and makes the text bold.
ID Selector
An ID selector selects a specific element based on its unique ID attribute value.
Example:
#my-id {
   background-color: yellow;
}
In this example, the #my-id selector selects the element with id="my-id" and sets its background color to yellow.
IDs should be unique and are often better for JavaScript hooks; for styling, classes are usually more reusable.
Ways to add CSS
Inline CSS
Inline CSS is used to apply a unique style to a single HTML element. It uses the style attribute of an HTML element. This method of insertion applies the CSS rules directly into the HTML file.
An example of inline CSS is as follows:

However, inline CSS is rarely used because it mixes HTML with CSS making the document harder to read and maintain. It also doesn't leverage the advantage of CSS being able to control multiple elements at once.
Internal CSS
Internal CSS, also known as embedded CSS, is used to apply CSS to a whole HTML page. The CSS rules are put in a <style> block in the <head> section of the HTML file.
An example of internal CSS is as follows:
<!DOCTYPE html>
<html>
   <head>
      <style>
         p {
            color: crimson;
         }
      </style>
   </head>
   <body>
      <p>This is a paragraph with internal CSS.</p>
   </body>
</html>

When to use internal CSS
- Prototypes
- Learning and testing
External CSS
External CSS involves creating a separate .css file and linking it to your HTML document. This method of insertion aids in minimizing code redundancy and promotes reusability. A single external stylesheet can control the appearance of multiple HTML pages, making it easier to maintain and modify the styling of numerous pages at once.
Here's an example of how to link to an external CSS file:
1. First create an external CSS file inside your project folder (style.css).
p {
  color: green;
}
2. Then, link this CSS file to your HTML document.
<!DOCTYPE html>
<html>
   <head>
      <link rel="stylesheet" href="style.css">
    </head>
    <body>
      <p>This is a paragraph with external CSS.</p>
    </body>
</html>

Why external CSS is best practice
- Reusable across pages
- Easier maintenance
- Cleaner HTML
- Better performance
External CSS is the recommended approach for real websites.
Cascading and Specificity
CSS follows a cascading and specificity model, which means that multiple styles can be applied to an element, and the most specific style takes precedence.
Specificity order (highest → lowest)
- Inline styles
- ID selectors
- Class selectors
- Tag selectors
Inline Styles
Inline styles are applied directly to individual HTML elements using the style attribute.
Example:
<p style="color: red;">This is a red paragraph.</p>
In this example, the inline style overrides any other styles applied to the <p> element.
Specificity
The specificity of a selector determines its priority when conflicting styles are applied. Inline styles have the highest specificity, followed by ID selectors, class selectors, and tag selectors.
- If specificity is equal, the later rule wins (the “cascade” part)
- !important overrides normal specificity
Common CSS Properties
CSS provides a wide range of properties to control the appearance of HTML elements. Here are a few commonly used properties:
- color: Specifies the text color.
- background-color: Sets the background color.
- font-family: Defines the font family to use for text.
- font-size: Specifies the font size.
- line-height: Controls spacing between lines of text.
- margin: Controls the outer spacing of an element.
- padding: Sets the inner spacing of an element.
- border: Defines the border style, width, and color.
Example HTML:
<h1>This is a heading</h1>
Example CSS:
h1 {
   color: blue;
   font-family: Arial, sans-serif;
   margin-bottom: 20px;
   padding: 10px;
   border: 1px solid black;
}
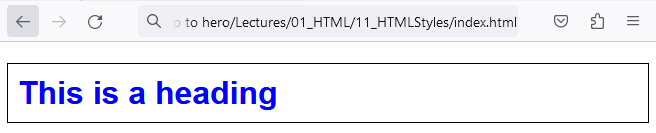
In this example, the <h1> element will have blue text color, use the Arial font (or sans-serif as a fallback), have a bottom margin of 20 pixels, 10 pixels of padding, and a solid black border with a width of 1 pixel.
Summary
Conclusion
CSS allows you to transform plain HTML into visually engaging web pages. By understanding CSS syntax, selectors, and how styles are applied and prioritized, you gain full control over how your webpages look.
This lesson sets the foundation for deeper CSS topics such as layouts, responsive design, and animations.
In the next lesson, we’ll dive further into HTML Best Practices to summarize our HTML Module before diving into CSS fully.